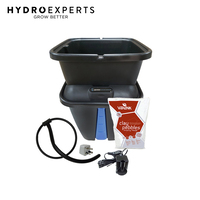
Plant!t (PlantIt) Aeros IV Master System | 4 Pot | DWC | Bubbler System
IN STOCK
POSTAGE APPLIES
NOW
$349.00 WAS $499.95
OFFER:
Save 34%!Sale Ends in 30 June 2025
Products You May Need


Pick up at store Free
Delivery Options:
If cart total is less than $499*
Freight applies
If cart total is $499* & above
Freight applies
*This item is bullky so freight applies.
International shipping
Click hereSECURE PAYMENTS WITH

BUY NOW, PAY LATER
Pay in 4, interest-free. Afterpay it.

ZIP NOW, PAY LATER
Repay on a convenient weekly, fortnightly or monthly schedule.

ENJOY NOW, PAY LATER


The PLANT!T aeros is a Deep Water Culture system, also commonly known as a bubbler system. These are very popular hydroponic systems that require very little growing media but do require a lot of nutrient/water solution.
The PLANT!T aeros is best suited for short-term and seasonal cropping plants.
The plant is supported in a net pot filled with a growing media such as clay pebbles and the roots are submerged in a highly oxygenated nutrient/water solution. The PLANT!T aeros includes a single outlet air pump and a submersible airstone to provide a large amount of oxygen to the roots of the plant, resulting in rapid growth.
The bubbles produced by the airstone keep the nutrient/water solution constantly moving and oxygen-rich so that the roots stay healthy.
It is important to monitor EC and pH levels closely with this system in order to gain optimum results. This is easy to do by simply removing the inspection port cover and taking a pH/EC reading.
Note: [2] x 7500 precision pump & [1] x Hydro water pump are included
Features
- Purpose design – better than a DIY system, everything you need is included
- Easy to monitor – remove inspection port cover to check pH/EC readings
- Flexible – plants can be moved around as each PLANT!T® aeros is a standalone system
In The Box
- [1] x Master Tank with Level Indicator
- [1] x Master Lid
- [1] x Inspection port cover
- [2] x 13mm Barb to ½” Thread connector
- [1] x Master Delivery Assembly
- [2] x Two Outlet Air-Pump
- [4] x Silicon Air-line clear tube 1m length
- [4] x Air-stone
- [4] x Planter Tank
- [4] x Planter Lid with 127mm (5” hole)
- [4] x 13mm Barb to ¾” Thread connector
- [2] x Master Return Assembly
- [2] x 7500 precision pump
- [1] x Water pump
- [4] x Mesh Bottom Pot
Starting Up and Planting in the AeroGarden System
Fill the system with nutrient solution through the Master Tank, up to the top marker on the Level Indicator (approximately 75L), which will be about halfway up the Mesh Pots. Turn on the Air Pump and you should see bubbles vigorously circulating in each Planter, aerating the roots. It is recommended to use clay pebbles as the planting medium in the Mesh Pot – they should be thoroughly rinsed to remove any dust particles before use.
Planting
Only select strong, healthy transplants for the aero system (if the selected plant was previously grown in soil, coco coir, or another media, it is advisable to gently wash the root ball to remove as much of the media as possible). Ideally, the plants will have been started in propagation plugs and be well-rooted.
Partially fill the Mesh Pots with clay pebbles (or a suitable inert alternative media) and place the plants so that the base of the plugs/blocks or the roots are just in contact with the nutrient solution. Then fill around them with more pebbles – ideally just covering the surface of the plugs/blocks.
Ensure no pebbles fall into the Planter tank, as they may clog the Master Return Assembly.
Ongoing Maintenance
The nutrient solution level should be topped up as frequently as possible, ideally maintaining the volume as close to the chosen 'full' level as possible. Treat the lowest level line on the level indicator as an absolute minimum. Top up primarily through the Master Tank, either using the inspection port if topping up with a watering can or easy-pour jug, or by lifting the lid and pushing to one side (take care the Master Delivery Assembly does not disconnect from the water pump), if using a bucket or larger jug.
Tip: When topping up with nutrient solution, you may wish to pour some through the pebbles directly into each Planter to help prevent the buildup of unsightly mineral salts on the pebbles' surface.
The solution will need to be changed periodically to prevent the buildup of impurities and to maintain balanced nutrients. This can be done in two ways:
- Occasional full solution change – requiring a complete emptying and refilling of the system. Recommended at least every two weeks (do not be concerned about small volumes left in the base of the Tanks).
- Frequent partial water changes – requiring removal of about 5 liters prior to topping up (every time you do so). This should be done from the Master Tank and the Water Pump (with an extra piece of 13mm/1⁄2” hose) can be used. There is no need to turn off the Air Pumps during this process.
Nutrient solution parameters like pH and EC can be monitored via the inspection port on the Master Tank, which is large enough to accommodate most meters. The circulating nature of the aero system means the pH and EC will always be equal throughout. Always carefully replace the inspection port cover to prevent algae growth.


 Calculate shipping


![[6] x FloraFlex Square Flood & Drip Shield w/ Quicker Drippers - 150MM (6")](/assets/thumb/FITT50302.jpg?20210309040741)


